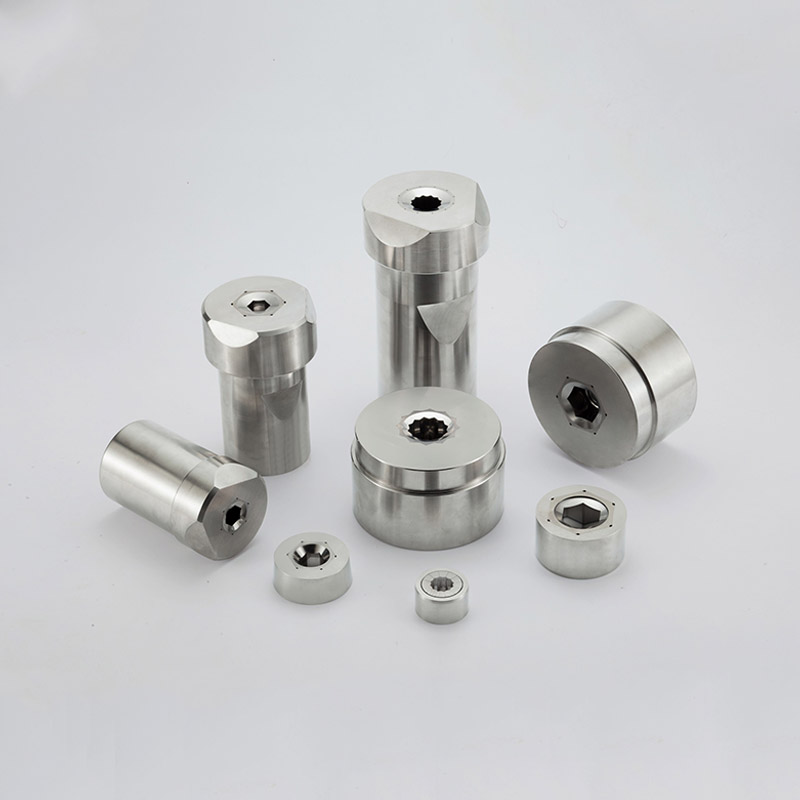
Cold Heading Molds are fundamental to the mass production of high-performance fasteners and mechanical parts. Their durability, accuracy, and overall performance directly affect the efficiency and quality of the Cold Heading process. One of the most critical aspects in mold performance is manufacturing precision—from design and machining to final assembly.

Importance of Precision in Cold Heading Molds
Cold heading is a high-speed forming process that transforms wire or rod stock into shaped parts without removing material. During this process, extreme forming forces are applied within the mold cavity. If the mold components are not precisely manufactured and aligned, it can result in part defects, increased tool wear, and even catastrophic mold failure.
Therefore, manufacturing cold heading molds requires ultra-high precision machining, strict quality control, and expertise in material behavior under high stress.
Key Precision Control Points in Cold Heading Mold Manufacturing
1. Coaxiality (Concentricity)
The alignment between the punch and die cavity is essential for ensuring symmetrical forming and avoiding off-center stress. Poor coaxiality can cause uneven material flow, resulting in part deformation and premature mold wear.
Standard Tolerance: Often within ±0.002 mm for high-precision molds.
Control Method: CNC grinding and fine alignment in mold assembly stages.
2. Die Cavity Surface Finish
The inner surface of the die cavity must be extremely smooth to facilitate material flow, reduce friction, and prevent sticking or galling during high-speed forming.
Target Roughness: Typically Ra 0.2 μm or better.
Machining Techniques: Precision CNC turning, fine grinding, polishing, or EDM finishing.
3. Dimensional Tolerances
Every mold component—including punches, dies, sleeves, and spacers—must meet strict dimensional tolerances to ensure correct fitting and consistent part geometry.
Hole and shaft fits are often designed to ISO H6/h5 standards.
Forming sections require even tighter tolerances for accurate part shaping.
4. Hardness and Heat Treatment Consistency
Heat treatment is not just for hardness—it also affects the mold’s dimensional stability and resistance to cracking. Improper treatment can lead to warping, which compromises tolerance.
Typical hardness for working components: HRC 58–65.
Control Methods: Vacuum heat treatment, sub-zero treatment, and double tempering.
5. Component Matching Accuracy
Cold heading molds often involve interchangeable inserts. The interface fit between mold body and inserts must be tightly controlled to prevent micro-movement under pressure.
Fit Accuracy: Gap between mating surfaces often within 1–2 μm.
Assembly Process: Shrink fitting, precise torque locking, or zero-clearance adjustment.
Manufacturing Process of Cold Heading Molds
The manufacturing workflow typically includes the following steps:
1. Material Selection and Cutting
Materials like HSS (M2, M42), powder metallurgy steels, or Tungsten Carbide are selected based on wear and impact resistance.
Blanks are cut via band saw or wire EDM for better precision.
2. Rough Machining
Lathes and mills are used to shape the general outline.
Rough machining removes most of the material while reserving allowance for fine finishing.
3. Heat Treatment
Vacuum quenching and tempering improve wear resistance.
For carbide parts, no heat treatment is needed, but strict sintering quality is ensured.
4. Finish Machining
CNC turning, grinding, jig boring, and EDM achieve high-precision dimensions.
Inner cavities are often ground and then polished to exact tolerances and surface roughness.
5. Assembly and Fitting
Die inserts and sleeves are fitted with shrink techniques or press fitting.
Punches are tested for alignment and concentricity with dies.
6. Inspection and Quality Control
CMM (Coordinate Measuring Machines) for 3D geometry inspection.
Roundness testers, roughness testers, and micrometers are used throughout the process.
Test forming is done to validate the mold before mass production.
The manufacturing precision of cold heading molds is a decisive factor in achieving high-volume, defect-free production of cold-headed parts. With ever-increasing demands for complex geometries and tighter tolerances, manufacturers must combine advanced machining technology, skilled craftsmanship, and rigorous inspection protocols.
By paying close attention to coaxiality, surface finish, dimensional tolerance, and assembly accuracy, mold makers can deliver durable, high-performance tooling that maximizes productivity and minimizes downtime—driving long-term value for fastener and hardware producers worldwide.


